
In This Article
An fdm printer for miniature wargaming terrain is a filament-based 3D printer with enough build area, speed, and reliability to turn spools of plastic into walls, ruins, and dungeon floors for 28mm games. It trades the razor detail of resin for volume, toughness, and a far lower cost per piece.
Under the hood it runs on fused filament fabrication, where a heated nozzle lays molten thermoplastic down layer by layer. Simple idea. Surprisingly deep rabbit hole.
Picture the scene. Your friends arrive in three hours, and the table is a sad green mat with two cereal boxes pretending to be a bunker. Now picture the same table with a ruined chapel, a corridor of crumbling flagstones, and a barricade you can shove a tank behind. That gap between cardboard and centerpiece is exactly what the right machine closes.
Here’s the catch: spec sheets love to brag about speed and quietly skip the things that decide whether terrain actually gets made. How big is the bed? Does it stay put at 3 a.m. when a 14-hour wall section is halfway done? This guide compares seven real machines on those questions, from compact starters to cavernous builders. It also covers an fdm printer for tabletop terrain tiles, a large bed printer for dungeon terrain, modular terrain tiles, layer height, and nozzle diameter. All prices below are ranges from October 2026 research, so check current pricing before you buy.
Quick Comparison: 7 Printers at a Glance
| Printer | Build Volume | Enclosed? | Approx. Price Range | Best For |
|---|---|---|---|---|
| Bambu Lab A1 Mini | 180×180×180 mm | No | around $200–$300 | First-timers on a tight budget |
| Bambu Lab A1 | 256×256×256 mm | No | around $300–$400 | Best all-round starter for 6-inch tiles |
| Elegoo Centauri Carbon | 256×256×256 mm | Yes | around $300–$400 | Value hunters who want an enclosure |
| Bambu Lab P1S | 256×256×256 mm | Yes | $400–$700 by bundle | Long-term reliability and PETG/ASA |
| Anycubic Kobra 3 Max | 420×420×500 mm | No | $400–$600 range | Oversized floors and big scenery |
| Sovol SV08 | 350×350×345 mm | No (optional enclosure) | $525–$600 range | Tinkerers who want big CoreXY speed |
| Creality K2 Plus | 350×350×350 mm | Yes (heated chamber) | $1,200–$1,500 range | Premium multicolor and big batches |
Looking at the table, the Bambu Lab A1 and Elegoo Centauri Carbon share the same 256 mm footprint, so the choice between them comes down to enclosure and ecosystem rather than raw capacity. The Anycubic Kobra 3 Max and Sovol SV08 are the value kings for sheer bed size, while the Creality K2 Plus costs roughly three times as much as the mid-range pair for a heated chamber and multicolor. The Bambu Lab A1 Mini is the cheapest way in, but its small bed will limit which tiles you can print.
💬 Just one click — help others make better buying decisions too!😊
Top 7 FDM Printers for Miniature Wargaming Terrain: Expert Analysis
1. Bambu Lab A1 Mini — cheapest way into terrain printing
The Bambu Lab A1 Mini earns its spot by making the first print painless. It calibrates itself, runs at up to 500 mm/s, and hums along at around 49 dB.
The 180 mm build cube is about seven inches a side. That fits a standard 6-inch (roughly 152 mm) tile with a sliver of margin, but not much more. Think skirmish scatter, barricades, crates, and individual tiles rather than big buildings printed in one piece.
Based on the spec comparison, this is the right call if your budget is the hard limit and your terrain is modular. Everything big gets built from small pieces anyway.
Reviewers consistently praise the speed, quiet operation, and beginner-friendly setup. TechRadar’s review scored it five stars, and Tom’s Hardware gave it an Editor’s Choice. The most common complaint is the small volume.
Pros:
- ✅ Self-calibrating and quick to set up
- ✅ Quiet enough for a living room
- ✅ Fits standard 6-inch tiles
Cons:
- ❌ 180 mm volume rules out big one-piece scenery
- ❌ Open frame, so PLA-focused
Expect to pay around $200–$300. Verdict: excellent value if you accept the size ceiling, but you’ll hit it faster than you expect.
2. Bambu Lab A1 — the sweet spot for most gamers
If the Bambu Lab A1 Mini is a studio apartment, the Bambu Lab A1 is the one-bedroom with room to breathe. The 256 mm cube (about ten inches) lets you print a 6-inch tile plus extras, or batch several 4-inch tiles in one run.
That matters because batching is how a terrain table actually gets built. A 2×2 grid of 4-inch tiles needs roughly 203 mm of bed, so a full set of dungeon floors goes into one overnight job instead of four separate ones. Auto-calibration carries over from the Mini, so the ease stays.
The honest analysis: this is the printer most hobbyists should start with. It covers fdm printer for tabletop terrain tiles use well without demanding a workshop.
Retailer listings I found show ratings in the mid-4s out of five across hundreds of reviews. Buyer guides also discuss early heated-bed safety incidents on this model, so read Bambu’s current support notes before purchasing.
Pros:
- ✅ 256 mm bed handles batches of tiles
- ✅ Same easy calibration as the Mini
- ✅ Mature slicer and software ecosystem
Cons:
- ❌ No enclosure for demanding materials
- ❌ Early safety-incident reports worth researching
Expect around $300–$400 (sales vary). Verdict: the best balance of cost and capacity on this list.
3. Elegoo Centauri Carbon — enclosed CoreXY without the premium tag
The Elegoo Centauri Carbon puts an enclosed CoreXY frame in the same price neighborhood as open-frame rivals. It offers a 256 mm cube, a 320°C hotend, a bed up to 110°C, and 500 mm/s maximum speed, though the maker recommends about 250 mm/s for everyday work.
In practice, that enclosure keeps drafts off your prints and quiets the machine. The 320°C hotend with a hardened steel nozzle means PETG and abrasive filaments become realistic options. If your terrain lives in a gaming-shop bag or a trunk, PETG’s extra toughness beats PLA for survival odds.
Reviewers highlight the strain-gauge bed leveling and high-flow direct-drive extruder. One European retailer lists a 4.8 out of 5 average over about 71 ratings, though that is a modest sample. A forum comparison also noted it costs roughly half what the Sovol SV08 does.
Pros:
- ✅ Enclosed frame for stable temperatures
- ✅ 320°C hotend handles tougher filaments
- ✅ Strong spec sheet for the price
Cons:
- ❌ 256 mm bed matches cheaper rivals
- ❌ Smaller community than Bambu’s ecosystem
Expect around $300–$400. Verdict: outstanding value if you want an enclosure now.
4. Bambu Lab P1S — the enclosed workhorse
The Bambu Lab P1S is the printer Bambu built its reputation on. It offers an enclosed 256 mm cube and a 500 mm/s top speed.
The enclosure is the headline here. It keeps temperature steady for ASA and ABS, which matters for outdoor display pieces or gaming-club terrain that gets handled constantly. For plain PLA tiles, though, you’re paying for features you may not need.
Buyer guides frame it as a printer you buy once and keep for years, and at least one 2026 guide flags heat-creep caveats worth reading before purchase. Pricing swings widely by bundle, with the standalone unit sitting well below the multicolor combo.
Pros:
- ✅ Enclosed, with dependable output
- ✅ Handles PETG and ASA better than open frames
- ✅ Huge community and accessory support
Cons:
- ❌ Costs more than same-size open-frame options
- ❌ Heat-creep caveats noted in some guides
Expect around $400–$700 depending on bundle. Verdict: worth it if you’ll branch beyond PLA; otherwise the Bambu Lab A1 is the smarter spend.
5. Anycubic Kobra 3 Max — enormous floor space on a modest budget
The Anycubic Kobra 3 Max offers a 420×420×500 mm build volume. That’s one of the largest in the consumer class, and the headline for anyone shopping a large bed printer for dungeon terrain.
In plain terms, you can print a 2×2 grid of 6-inch tiles (about 305 mm square) with room to spare. It’s an open-frame bedslinger with Klipper-based firmware, auto-leveling, and quick-release nozzles, and its 0.6 and 0.8 mm nozzles are optional extras.
The trade-off is footprint. The machine is roughly 706×640×753 mm, so measure your desk before you click buy.
3DTested gave it an Editor’s Choice and noted that bed adhesion is still a little dicey. Owners commonly fix this with glue stick or a plate swap. A Spanish aggregator also lists a need for constant calibration at high speeds.
Pros:
- ✅ Massive 420×420×500 mm print volume
- ✅ Reliable auto-leveling per reviewers
- ✅ Great price for the size
Cons:
- ❌ Bed adhesion needs a glue stick or plate upgrade
- ❌ Huge footprint demands desk space
Expect around $400–$600. Verdict: the best size-per-dollar pick for floor tiles and big scenery.
6. Sovol SV08 — a big CoreXY for the tinkerer
The Sovol SV08 is a Voron 2.4 tribute: 350×350×345 mm, CoreXY, up to 700 mm/s, linear rails on every axis, and four independent Z motors. It ships mostly pre-assembled, with the main job being the four gantry uprights. Tom’s Hardware describes it as an afternoon’s build.
For terrain, that 350 mm bed is the clever middle ground. It fits a 2×2 grid of 6-inch tiles without the sprawl of the Anycubic Kobra 3 Max. The open frame suits PLA, though an enclosure is optional.
Tom’s Hardware praises the Klipper firmware, direct drive, and that it doesn’t need cloud access, and flags the basic touchscreen. A Swiss retailer lists a 3.7 out of 5 average over 15 reviews, and another summary notes some hotend durability and customer-service complaints. Treat this as a printer for people comfortable with tinkering.
Pros:
- ✅ 350 mm bed, ideal for 2×2 tile grids
- ✅ Klipper firmware and linear rails
- ✅ Open-source, mod-friendly design
Cons:
- ❌ Assembly takes an afternoon
- ❌ Mixed reviews on hotend durability
Expect $525–$600. Verdict: strong for hands-on hobbyists, riskier for plug-and-play seekers.
7. Creality K2 Plus — the premium cave-sized canvas
The Creality K2 Plus pairs a 350×350×350 mm bed with an enclosed CoreXY frame, a heated chamber up to 60°C, 600 mm/s speeds, and 30,000 mm/s² acceleration. Its Creality Filament System supports multicolor printing, expandable to 16 colors.
For terrain, multicolor means stone-and-moss floor tiles that need less paint. The heated chamber also opens up ABS and ASA for display-grade pieces.
It’s a heavyweight at 35 kg. One reviewer moved it to the floor because their table felt flimsy, so plan your bench accordingly.
Retailer listings show scores in the mid-4s to near 5 out of 5, though sample sizes vary and review counts are unevenly distributed.
Pros:
- ✅ 350 mm cube with an enclosed heated chamber
- ✅ Multicolor option reduces painting
- ✅ Very fast acceleration
Cons:
- ❌ Costs three times the mid-range options
- ❌ Heavy at 35 kg
Expect around $1,200–$1,500. Verdict: justified only for clubs, multicolor fans, or prolific builders.
✨ Don’t Miss These Exclusive Deals!
🔍 Take your terrain table to the next level with these carefully selected printers. Click on any highlighted product to check current pricing and availability. These machines will help you create authentic dungeons, ruins, and battlefields your whole gaming group will love!
Real-World Scenarios: Which Printer Fits Which Gamer
Specs only matter when matched to a life. Here are three realistic profiles.
The apartment skirmish gamer. You play 28mm skirmish twice a month, live in a small flat, and have a firm $300 ceiling. The Bambu Lab A1 Mini fits the bench and the noise limit, and 6-inch tiles are still on the menu. If your budget stretches slightly, the Bambu Lab A1 adds batching headroom. Printing for an evening or two a week is plenty.
The weekly dungeon master. You run a Friday campaign and want modular floors, doors, and cavern walls for every session, with a $400–$600 budget and a garage or spare room. The Elegoo Centauri Carbon gives you an enclosed, tidy machine. The Anycubic Kobra 3 Max gives you the volume for printing four tiles at once, trading the enclosure for sheer capacity.
The club terrain-builder. You supply a gaming hall with ten tables and print most days. The Sovol SV08 offers big-bed CoreXY speed at a fair price. The Creality K2 Plus adds multicolor and a heated chamber for display pieces. At this volume, print time per tile becomes your real cost, and faster, larger machines pay back quickly.
The pattern is simple. Match bed size to tile size, and match enclosure to material ambition.
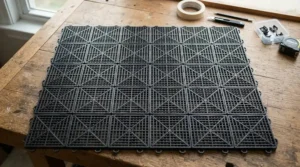
Your First 30 Days: Practical Setup and Maintenance Guide
Buying the printer is the easy part. These steps stop a promising weekend from turning into a plastic spaghetti incident.
Week one: foundations. Put the printer on a sturdy surface, since wobble shows up as ripples in your walls. Run the automatic calibration, then print a single test tile before committing to a full set. Clean the bed with isopropyl alcohol before each session. PETG may need a glue stick as a release agent.
Week two: dial in tile settings. Start at a 0.2 mm layer height, the standard recommendation for modular terrain. Print one tile, check how well it clicks into its neighbors, and adjust. Walls rarely need dense infill, so a modest percentage typically saves hours and filament without hurting tabletop durability.
Weeks three and four: scale up. Batch tiles onto one plate once you trust your settings. Dry your filament if it pops or sizzles, and keep spools sealed between sessions.
Common first-month mistakes:
- Skipping the test tile and discovering a calibration issue 12 hours into a job
- Printing at maximum advertised speed instead of the recommended one
- Ignoring warped corners, which break tile-to-tile fit
- Forgetting to check the nozzle after a failed print
How to Choose an FDM Printer for Tabletop Terrain Tiles
An fdm printer for tabletop terrain tiles needs the right bed size, reliable leveling, and good filament compatibility. Work through these steps in order.
- Decide your tile size first. A 6-inch tile is about 152 mm, so a 180 mm bed just fits and a 256 mm bed handles batches.
- Match bed size to batch ambitions. A 350 mm bed fits a 2×2 grid of 6-inch tiles, which transforms how fast you build a table.
- Prioritize auto-leveling. First-layer failures are the number one cause of ruined tile sets, and automatic leveling removes the guesswork.
- Decide on an enclosure. For PLA only, open frames are fine. For PETG, ASA, or ABS, an enclosed machine is safer and more stable.
- Check nozzle and filament flexibility. Models that accept 0.6 mm nozzles and handle higher temperatures give you more future options.
- Count your desk, not just your budget. The Anycubic Kobra 3 Max and Creality K2 Plus are heavy and wide.
- Weigh the ecosystem. Slicer quality, community support, and spare parts matter more than a 10 percent speed difference.
Large Bed Printer for Dungeon Terrain: When Bigger Actually Helps
A large bed printer for dungeon terrain sounds like pure upside. Mostly it is, with caveats.
The big win is batching. A 350 mm or 420 mm bed lets you print four 6-inch tiles per run, which is the difference between finishing a dungeon floor in one overnight job and spreading it across a week. It also unlocks one-piece buildings, tall towers, and big scenic bases that would otherwise need glue-up from smaller sections.
The costs are real, though. Larger beds take longer to heat, bigger machines need sturdier benches, and a failure late in a long job wastes more filament. The Anycubic Kobra 3 Max at roughly 706×640 mm and the 35 kg Creality K2 Plus both demand planning.
Based on the spec comparison, the sweet spot for most modular terrain builders is the 350 mm class, as with the Sovol SV08. It fits a 2×2 grid of 6-inch tiles without the sprawl of a 420 mm machine. If you mostly print single tiles and walls, a 256 mm bed is genuinely enough.
Modular Terrain Tiles: How Your Printer Choice Shapes the System
Modular terrain tiles are the reason a printed terrain collection stays manageable. Snap-together pieces let you rebuild a dungeon for each session rather than storing one giant model.
The best-known standard is OpenLOCK, a free, open-source system for connecting modular 3D printable terrain, originally developed by Printable Scenery and now used across the tabletop community. Its recommendations call for a 0.2 mm layer height for normal quality, with 0.1 mm as the high-quality option.
What does that mean for your printer? Precision matters more than speed. Clips and slots must fit consistently, so calibrated, rigid machines like the Bambu Lab P1S and Elegoo Centauri Carbon have an edge. OpenLOCK-compatible magnetic clips also let you build fully interchangeable layouts, and you’ll find plenty of ready-made dungeon sets on marketplaces like MyMiniFactory.
If your printer drifts or warps, tiles that fit perfectly in a test print will gap or bind across a whole table. That’s why we recommend printing a calibration tile before any big run.
Layer Height: The Setting That Decides Print Time and Detail
Layer height is the vertical thickness of each plastic slice, and it’s the biggest lever you have over print time versus surface quality.
For terrain, the usual starting point is 0.2 mm on a standard nozzle. Thinner layers (0.1 mm) smooth out curves and fine brickwork but can multiply print times. Thicker layers print faster but show visible ridges, which are less noticeable on rough stone, cavern walls, and anything you’ll drybrush.
There’s a hard rule too. Prusa’s documentation advises keeping layer height below roughly 80% of nozzle diameter, which works out to about 0.32 mm on a 0.4 mm nozzle. A University of Maryland guide describes a “goldilocks” zone of roughly 25–75% of nozzle diameter.
My read: for dungeon floors that will be painted and handled, 0.2 mm is a dependable default. Save 0.12–0.16 mm for hero pieces where detail shows. The Creality K2 Plus lists a layer height range of 0.05–0.3 mm, which gives you room at both ends.
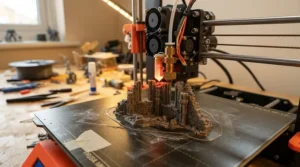
Nozzle Diameter: Why a Bigger Nozzle Is a Terrain Secret Weapon
Most printers ship with a 0.4 mm nozzle, and that’s fine. But terrain isn’t tiny miniature detail, and a bigger nozzle can transform your print times.
Prusa’s nozzle guide explains that a larger nozzle lays wider perimeters, needs fewer passes to build a wall, and allows taller layers, so the combination noticeably shortens print time. It lists a maximum layer height of about 0.32 mm for a 0.4 mm nozzle and up to 0.48 mm for a 0.6 mm nozzle. You can read the details in Prusa’s guide to different nozzle sizes.
A 0.6 mm nozzle is a popular middle ground for terrain: sturdier walls, faster prints, and still enough detail for stone texture. Detail on small features will soften, so keep 0.4 mm for fiddly pieces.
Compatibility matters. The Anycubic Kobra 3 Max lists optional 0.6 and 0.8 mm nozzles, and the Elegoo Centauri Carbon supports a standard 0.4 mm with a hardened steel nozzle. Check your printer’s nozzle options before you commit, because swapping is cheap but not every model supports every size.
FDM vs Resin for Wargaming Terrain
| Factor | FDM | Resin | Best For |
|---|---|---|---|
| Cost per large piece | Lower | Higher | FDM for floors and walls |
| Build volume | Large beds available | Compact | FDM for modular tiles |
| Fine detail | Good | Excellent | Resin for hero miniatures |
| Handling durability | Tough | Often brittle | FDM for tabletop wear |
| Post-processing | Minimal | Washing and curing | FDM for faster workflow |
Several reviewers note that resin is slower and more expensive per cubic centimeter than FDM, and that it’s overkill for chunky terrain. The consistent advice is to save resin for miniatures and let a filament printer handle the large-surface work.
In practice, the table points the same way: choose FDM for the table and resin for the troops. The Bambu Lab A1 is a natural fit if you ever add a resin machine later for characters, since it handles terrain while the resin unit handles detail.
Features That Actually Matter (And Those That Don’t)
Marketing loves a big number. Here’s how to filter it.
Features that matter:
- Auto-bed leveling: the biggest cure for first-layer failures.
- Bed size: it dictates tile size and batch capacity.
- Enclosure (if you want PETG or ASA): it stabilizes temperature.
- Nozzle flexibility: it opens up faster terrain prints.
- Reliable ecosystem and spare parts: you’ll need both eventually.
Features that matter less:
- Maximum speed: the Elegoo Centauri Carbon quotes 500 mm/s but recommends about 250 mm/s for everyday use, and the Anycubic Kobra 3 Max recommends 300 mm/s despite a 600 mm/s ceiling. Quoted maximums are best-case numbers, not daily reality.
- Multicolor systems: nice for scenic bases, optional for gray stone.
- Camera and AI monitoring: handy, but not essential.
What the spec sheet won’t tell you, but reviewers note, is that real-world quality comes from calibration and consistency rather than the highest acceleration figure.
Long-Term Cost and Maintenance
The sticker price is the opening bid. Total cost of ownership includes filament, spare nozzles, build plates, and your time.
Filament dominates over the years. Terrain is plastic-hungry, so a larger machine that prints batches saves attention, not material. Fewer failed prints is the real saving, which is why reliable leveling and an enclosure can beat a cheaper, finicky machine.
Maintenance is modest but real. Clean the plate regularly, replace worn nozzles, and keep filament dry. Brands with strong ecosystems, such as the Bambu Lab A1 and Bambu Lab P1S, tend to have readily available spare parts, while open-source machines like the Sovol SV08 reward people who enjoy upgrading and repairing.
A rough value framing: the Bambu Lab A1 Mini is the cheapest per printer, the Anycubic Kobra 3 Max is the cheapest per square inch of bed, and the Creality K2 Plus is the most expensive but the most flexible. Decide which cost matters most to you before you buy.
Safety, Ventilation, and Filament Choices
Filament printers heat plastic, and that releases particles and vapors. It’s worth treating with respect.
NIOSH researchers who measured emissions from desktop printers in real workplaces found that heating polymer filament releases ultrafine particles and organic chemicals into the air, and they tested ways to reduce those emissions, including using the covers and doors that come with the printer. University safety guides add that most desktop printers have no built-in exhaust or filtration and that emissions can be a problem in poorly ventilated rooms.
Practical steps:
- Print in a room with good airflow, not a sealed bedroom.
- Prefer PLA for casual use, since guides report lower emissions than ABS.
- Use an enclosure and keep doors closed while printing.
- Let the printer cool and the air clear before opening it.
- Never defeat safety interlocks or leave a machine running unattended in a cramped space.
An enclosed machine like the Elegoo Centauri Carbon or Bambu Lab P1S contains emissions better than an open frame. If you choose an open printer, ventilation matters even more.
FAQ
❓ How big a bed do I need for dungeon tiles?
❓ Is the Bambu Lab A1 Mini enough for wargaming terrain?
❓ Should I use a 0.6 mm nozzle for terrain?
❓ Do I need an enclosed printer for PLA terrain?
❓ Can I print modular terrain tiles without painting them?
Conclusion: Pick the Printer That Fits Your Table
The right fdm printer for miniature wargaming terrain isn’t the fastest or the biggest. It’s the one that matches your tile size, your budget, and the room you’ll actually print in.
If you want the safest starting point, the Bambu Lab A1 balances size, ease, and price. If you prefer an enclosure without paying a premium, the Elegoo Centauri Carbon is hard to beat. For the largest floors per dollar, look at the Anycubic Kobra 3 Max, and for a big-bed CoreXY with tinkering appeal, the Sovol SV08 delivers. The Bambu Lab P1S is the dependable enclosed workhorse, the Bambu Lab A1 Mini is the budget entry, and the Creality K2 Plus is the premium option for heavy users.
Remember the quiet heroes too: a sensible layer height, a well-chosen nozzle diameter, and modular terrain tiles that snap together instead of sitting in a cupboard. Get those right, and your table will stop looking like a cereal-box bunker.
✨ Ready to build your battlefield?
🔍 Pick the printer that matches your tile size and budget, check current pricing and availability on the products above, and start printing the terrain your games deserve. Your next campaign table is one spool away! 🎲
Recommended for You
- Enclosed Printer for Printing ABS Without Warping: 7 Best in 2026
- FDM Printer for Classroom Use with Safety Features: 7 Best Picks 2026
- Auto Bed Leveling FDM Printer for First Time Users: 7 Best 2026
Disclaimer: This article contains affiliate links. As an Amazon Associate, I earn from qualifying purchases. If you purchase products through these links, we may earn a small commission at no additional cost to you.
✨ Found this helpful? Share it with your friends! 💬🤗
